Lighting effects can help in creating a feeling of depth in you image. They take in a height map and various light and material parameters and produce a light map. This light map can then be composited with your object to produce a result that looks like light falling on the object.
There are two lighting filters: Diffuse Lighting and Specular Lighting. This is how lighting is usually created in computer graphics. Diffuse is how the light reflects off a completely matte object, the sides facing light are brighter and sides facing away from light are darker. Specular in turn is how the light reflects off a smooth surface, it creates bright spots where the light reflects towards the viewer.
There are two other common lighting properteries: ambient lighting and mirror reflection. Ambient is the light that doesn't seem to come from any particular direction. In filter effects, ambient component comes from the original colour of the object. Mirror reflections, as the name states, are reflections that show the image of other objects. Mirror reflections are not supported by this simple lighting model.
First, before I'll explain these filters more throughly, I'll tell you a bit about height maps. SVG drawings are two-dimensional and as such, they don't actually contain any depth information. Without depth information, everything in the scene is completely flat, and lighting totally flat objects would be rather useless, because everything would be of same brightness. Height maps are used to overcome this problem. Any image can be used as height map, the transparent areas of image are the lowest point and the more opaque a point is, the more it is considered to be above image plane.

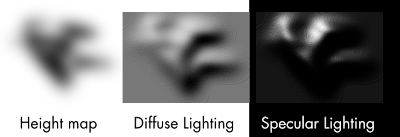
In this image, the height map here is completely black and lighter shades are more transparent areas. The light comes from top-left. You can see how this height map is used to create the looks of light falling on three-dimensional object.
For practical uses, it is often useful to create the height map automatically from the filtered object. Gaussian Blur, for example, is handy for this. The next image shows a height map derived from original object by Gaussian Blur

Again, the white areas in height map are transparent and more dark areas more opaque. The red line shows the original shape of the object, it's not actually part of the height map. The used lighting filter is from examples/lighting-filters.svg from Inkscape distribution. The result looks more like some rat-shaped badge than an actual rat, but I'd guess, it's quite fine for demonstration purposes.
So, enough of height maps, let's go to the actual effects. I'll start with Diffuse Lighting.
Diffuse Lighting is, as I stated above, the light reflecting off a completely matte object. In reality, it's hard to find any such object, but cotton cloth, unpolished stones, bricks and other such materials with highly uneven surfaces come close.

There's a bunch of settings for Diffuse Lighting, so let's go through them.
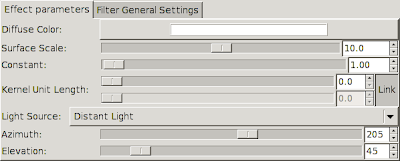
Diffuse Color sets the light colour to be used.
Surface Scale determines, how to map the height map to actual height values. The bigger the value, the higher the peaks of height map. Also, you can move this to negative side, to turn the peaks into valleys.
Constant modifies the strength of the light. High constants result in harsh lighting and strong contrasts between the light and dark areas.
Kernel Unit Length is not yet used in Inkscape. It is used to make the result resolution-independent. Now that it isn't used, with high zooms you can see odd plateaus forming. (There's an other way around this, though it requires using XML editor. See examples/lighting-filters.svg in Inkscape distribution)
Light Source determines the type of light used. Available settings below that also depend on type of light used.
The resulting image from Diffuse Lighting is fully opaque. It is best used by multiplying the colour values with the colour values of original image. This can be accomplished with Composite filter in Arithmetic mode and multipliers set as K1=1.0, K2=0.0, K3=0.0, K4=0.0. (See Composite tutorial for more through explanation of these factors)
Specular Lighting simulates light reflecting off a smooth surface. Plastic and metallic objects often have strong specular reflections, though for really smooth objects mirror reflection can become dominating.

Most settings for Specular Lighting are same as for Diffuse, so I'll just go through the new ones.
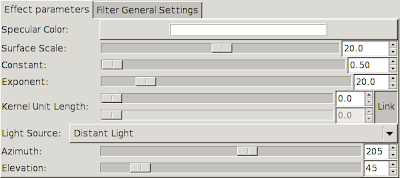
Specular Color is the same as Diffuse Color, it determines the light colour.
Exponent is completely new here: it determines the shininess or smoothness of the object. Low values correspond to not-really-shiny objects, high values to really smooth objects. Essentially, the higher the exponent value is, the smaller and sharper the shiny spots are.
Specular Lighting filter produces an image, that is filled with Specular Color, but opaque only where the specular highlights should fall. It is best used by adding the colour values with the colour values in the original image, or the colour values of diffuse shaded image, if you're using both lighting modes. This can be done with Composite filter in Arithmetic mode and multipliers set to K1=0.0, K2=1.0, K3=1.0, K4=0.0.
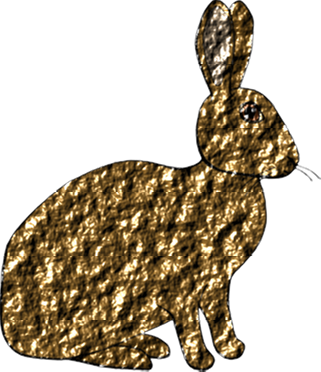
Although the filters I've shown here have used Gaussian Blur to create the height map, this is by no means a requirement. Any image will do, though preferably one with several shades of opacity. For example, using result of Turbulence filter as height map can create interesting effects. Here, I've used turbulence to create an effect that looks somewhat like crumbled tin foil.

The filter is available in Inkscape distribution in file examples/turbulence_filters.svg
2 comments:
This is some amazingly powerful bit of coding in there.
I'd like to work on developing material with it, but I am having issues with the interface.
If you wouldn't mind answering some of my questions, could you drop me an email?
Sincerely,
TJS
I'd like to note here: if you have questions, please ask them here in the blog comments. I'll try to answer them and this way the questions and answers will help all the readers, who might stumble upon these tutorials.
Post a Comment